You get one chance to make your listing stand out online. In Rocky Hill and greater West Knoxville, buyers are busy, practical, and drawn to homes that feel move‑in ready the moment they scroll the photos. If you stage with intention, you help them picture life there and make it easy to say yes.
This guide gives you a step‑by‑step staging playbook tailored to Rocky Hill. You’ll learn which rooms to prioritize, how to prep for photo day, what timeline to expect, and how to use our pre‑list kit to stay organized. Let’s dive in.
Why staging matters in Rocky Hill
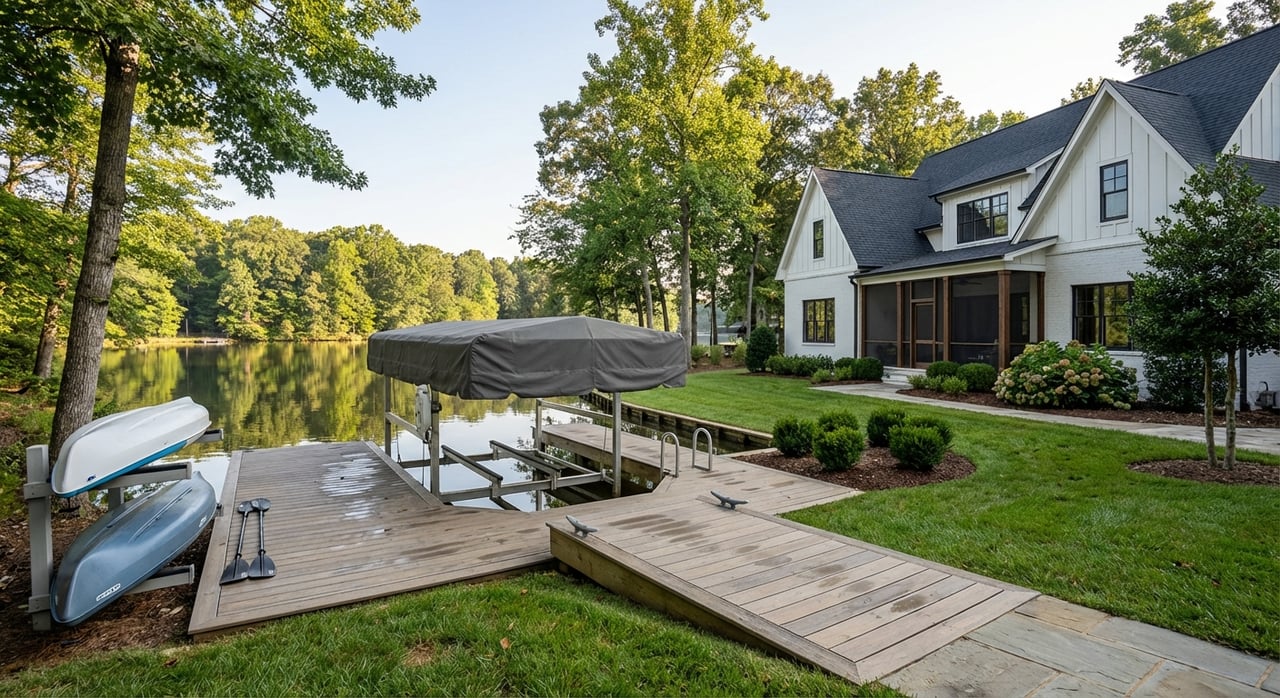
Buyers in West Knoxville value functional family spaces, outdoor living, and clean, updated finishes. In a humid subtropical climate, porches, patios, and shaded yards matter for much of the year. Staging that highlights these features helps your photos perform and your home feel turnkey.
Aim for a warm Southern‑suburban style with modern, neutral basics. Keep the look comfortable and welcoming, then add texture with textiles and a few curated accents. When possible, highlight storage, garage organization, and any energy‑efficient or mechanical upgrades.
Rooms that sell first
Kitchen: your top priority
- Clear 60–70% of countertop surface. Remove extra small appliances.
- Style one simple vignette like a fruit bowl, wooden board, or small vase.
- Use fresh neutral towels and turn on under‑cabinet lighting for photos.
- Polish stainless and match light bulb temperatures.
Primary bedroom: calm and spacious
- Keep a simple color palette with layered, hotel‑style bedding.
- Declutter nightstands and limit art to one or two pieces.
- Open closets to show organization and shelving.
- Remove bulky or extra furniture to improve flow.
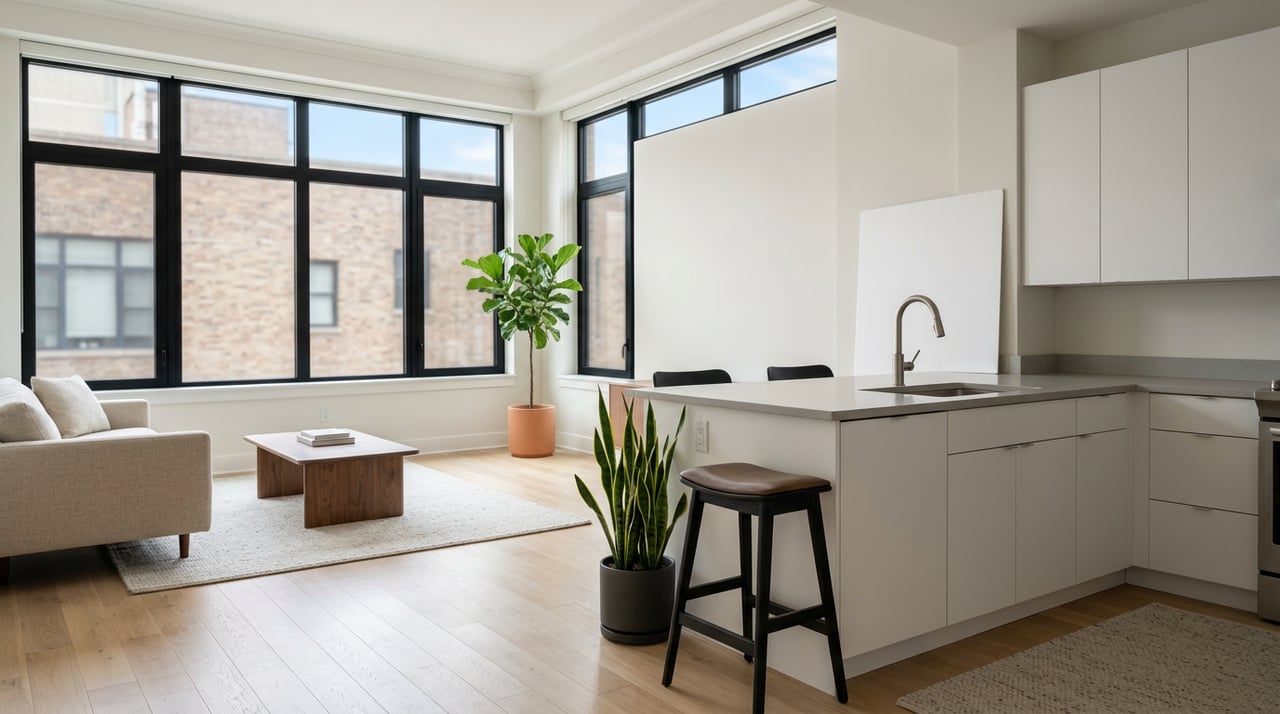
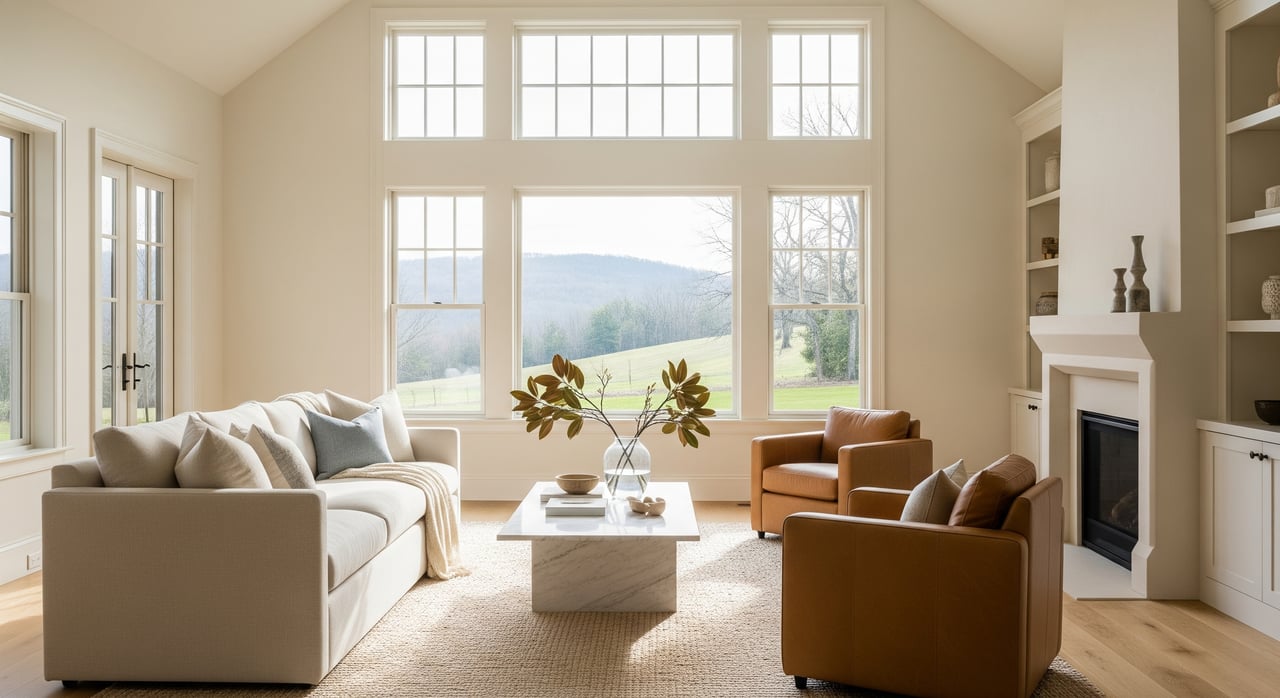
Main living area: flow and function
- Arrange seating to frame the focal point, such as a fireplace or view.
- Remove excess seating to open walkways and show scale.
- Add a light throw and pillows; remove personal photos.
- Anchor with a single coffee‑table vignette and a floor lamp.
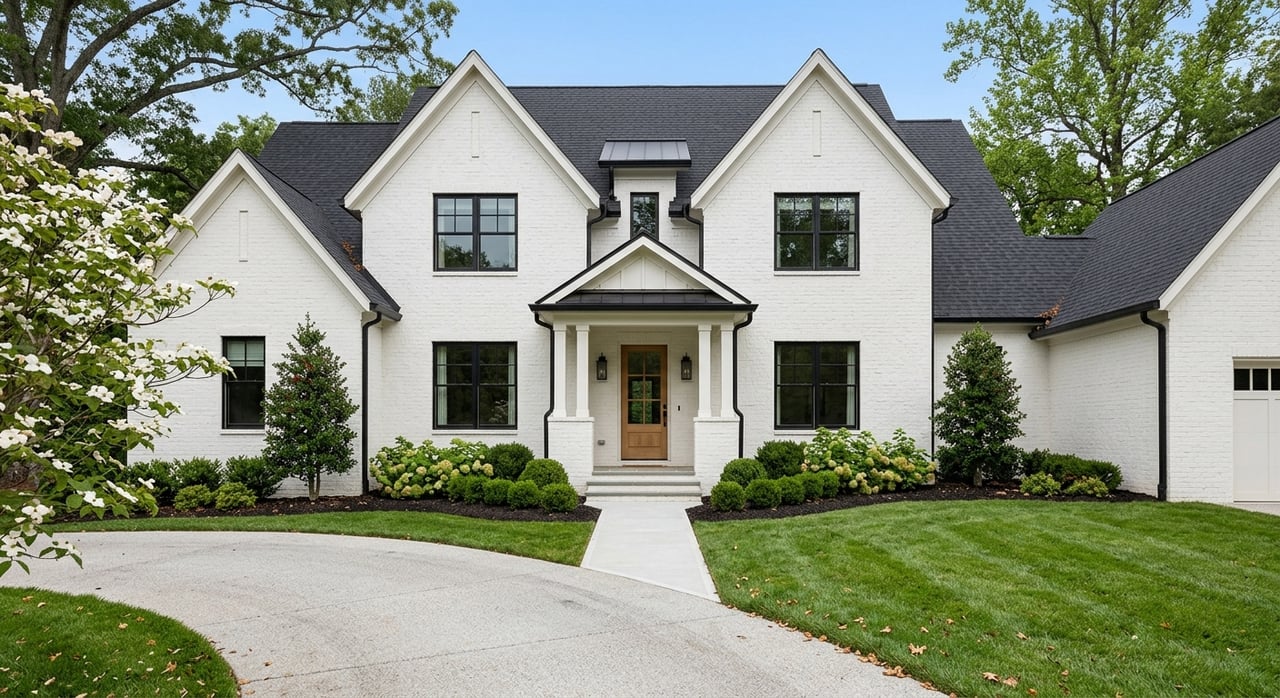
Entry and curb appeal: first impressions
- Power wash if needed. Clean the front door and replace the welcome mat.
- Trim bushes, edge the lawn, and add tidy potted plants or a bench.
- Update house numbers if worn. Clear the driveway for photos.
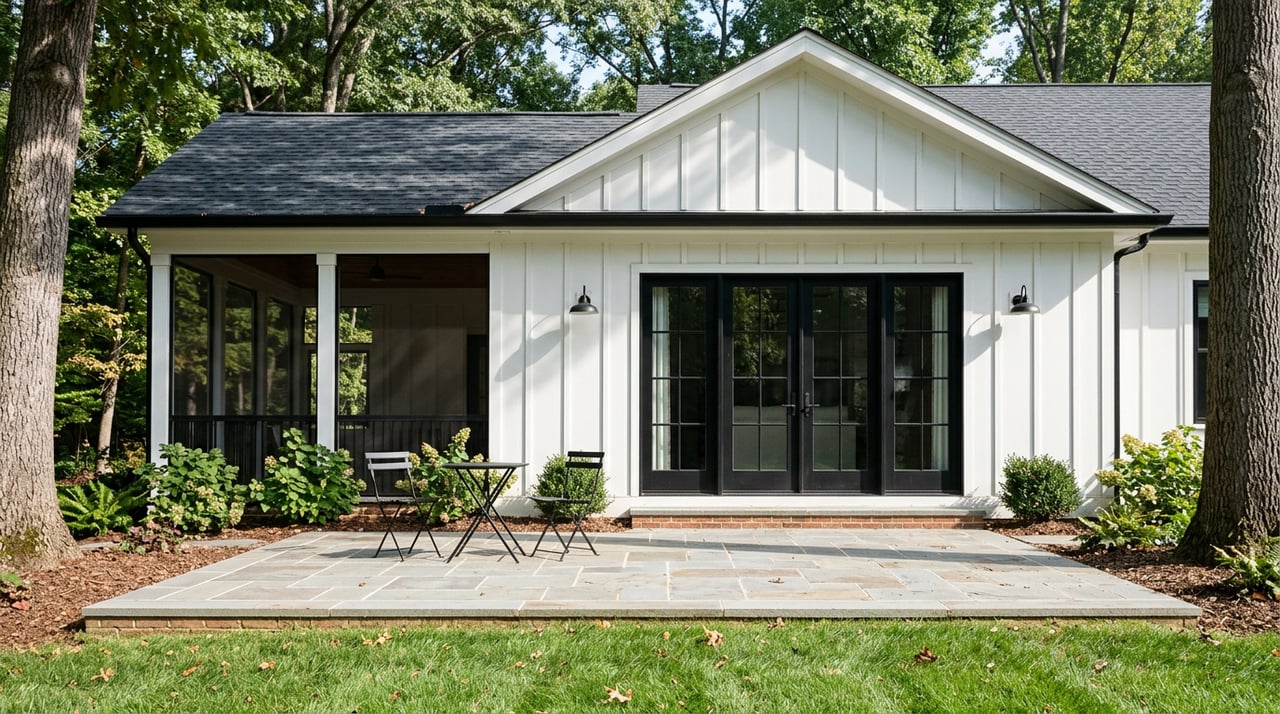
Outdoor living: extend the lifestyle
- Stage comfortable seating and a clean grill zone.
- Mow, edge, and showcase shade trees or privacy.
- Add a seasonal focal point like planters in spring/summer or a styled fire pit in fall.
Bathrooms: spotless sells
- Replace stained caulk and fix leaky fixtures.
- Remove personal products from sight.
- Lay out fresh neutral towels and a small plant.
- Ensure mirrors and glass are streak‑free.
Mudroom, laundry, and garage: show storage
- Clear floors and tidy shelves; use baskets to show order.
- Add hooks and simple labels to suggest everyday function.
- Keep lighting bright to make these spaces feel larger.
Photo‑day playbook
48–72 hours out
- Complete repairs and deep clean every room.
- Remove personal photos and political or religious items.
- Pack nonessential clutter; clear counters and stage décor.
- Mow and tidy landscaping if exterior shots are planned.
Day before the shoot
- Confirm photographer timing, access, and parking.
- Remove cars from driveway and garage.
- Relocate pets offsite if possible; remove bowls and litter boxes.
Day of photos: final pass
- Open all blinds and curtains; turn on every light and lamp.
- Make beds, fluff pillows, and fold throws.
- Hide cords, remotes, trash cans, and hygiene items.
- Place fresh, non‑fragrant greenery in key rooms.
- Set a comfortable thermostat.
- Walk each room for reflections in mirrors and windows.
What to ask your photographer
- Midday interiors with balanced light, using HDR or bracketed exposures.
- Wide shots to show scale and a few detail photos of finishes.
- A strong hero set: front exterior, kitchen, main living, primary bedroom, and one outdoor living image. For larger homes, add dining, primary bath, kitchen detail, and twilight exteriors.
- Floor plan and room measurements, plus a 3D tour if appropriate.
Timeline and budget: how we work
Here is a typical in‑house staging workflow so you know what to expect.
- Day 0: Staging consult, virtual or on‑site.
- Days 1–3: Declutter plan and minor repairs scheduled; you begin packing nonessentials.
- Days 3–7: Paint touch‑ups and repairs; staging inventory allocated and installation scheduled.
- Days 7–8: Staging install, usually 2–8 hours depending on scope.
- Days 8–9: Professional photos; images delivered within 24–72 hours.
- Listing goes live after photo approval.
Budget ranges vary by property size and scope. Nationally, many consultations are under $500, partial staging runs from several hundred to a few thousand, and full staging with furniture rental is often several thousand plus monthly rental fees. Always request a written estimate from our team and, if you wish, a quote from a local third‑party stager for comparison.
Before and after: quick wins that show
Living room
- Before: Oversized sofas, dark drapes, and busy surfaces.
- After: Right‑sized sofa plus two chairs, airy drapes open to the yard, one curated coffee‑table vignette, and a rug to define the zone.
- Result: Brighter photos that show scale and family‑friendly flow.
Kitchen
- Before: Countertop clutter, mismatched bulbs, and dated fixtures.
- After: Cleared surfaces, polished finishes, matched bulbs, a fruit bowl and herb planter, and updated or cleaned fixtures.
- Result: Crisp images emphasizing workspace and circulation.
Primary bedroom
- Before: Mismatched bedding and too much furniture.
- After: Neutral layered bedding, matching side tables, simple art, and an organized closet on display.
- Result: A restful retreat that reads larger in photos.
Exterior/porch
- Before: Overgrown planters and items on the porch; cars in the drive.
- After: Pressure‑washed surfaces, tidy planters, two chairs and a small table, and a clear driveway.
- Result: Instant curb appeal and lifestyle cues.
Seasonal staging in West Knoxville
- Spring and summer: Keep porches inviting with planters, clean cushions, and shade accents. Show how indoor and outdoor spaces connect for entertaining.
- Fall: Style a safe fire pit zone and add warm textures on porch seating. Keep leaves cleared for clean lines in photos.
- Winter: Focus on lighting, cozy textiles, and clutter‑free entries. Keep walkways clear and porches tidy to underscore year‑round usability.
Pre‑list kit: your step‑by‑step guide
Get organized with a single toolkit so you do not miss a step. Our recommended pre‑list kit includes:
- Pre‑staging checklist with a two‑week, one‑week, and 48‑hour timeline.
- One‑page photo‑day checklist for quick final passes.
- Declutter packing checklist and labeling system.
- Neutral paint and finish guide with undertone notes.
- Staging inventory form and room measurement template.
- Photo shot list and hero image checklist.
- Vendor/contact sheet template.
- What to expect on photo day one‑pager.
- Sample furniture layout sketches for common floor plans.
- Permissions and key‑release form for staging and photography.
Ask us for the downloadable kit in PDF and template formats so you can start strong.
Practical choices and disclosures
- Scope: Decide between a consultation only, partial staging, or full staging with rentals based on your budget, price point, and goals.
- Updates vs staging: Fix visible issues first. Staging cannot overcome major deferred maintenance.
- Scent policy: Skip heavy scents before showings. Use fresh, unscented linens and mild natural smells.
- Virtual assets: 3D tours and floor plans help serious buyers self‑qualify. If you use virtual staging for a vacant home, label photos clearly to meet MLS and state rules.
Ready to sell for more in Rocky Hill?
You do not need a complete overhaul to make a big impact. With targeted staging, smart photo‑day prep, and a clear plan, your Rocky Hill home can shine in West Knoxville’s competitive feed. If you want a tailored strategy and an in‑house team to handle the details, connect with Robert Threlkeld for a complimentary market consultation.
FAQs
What rooms should Rocky Hill sellers stage first?
- Prioritize the kitchen, primary bedroom, and main living area, then the entry, outdoor living, bathrooms, and finally storage zones like mudroom, laundry, and garage.
How much does professional staging cost in West Knoxville?
- Many consults are under $500, partial staging runs from several hundred to a few thousand, and full staging with rentals is often several thousand plus monthly fees; request a written estimate.
Do I need to repaint before listing my Rocky Hill home?
- Repaint if walls are very dark, bold, or scuffed; neutral tones photograph better and let buyers imagine their style without distraction.
What outdoor updates matter most in West Knoxville’s climate?
- Clean, staged porches or patios with seating, tidy landscaping, and visible shade or tree cover highlight outdoor living that buyers value most of the year.
Should I use virtual staging for a vacant property?
- It can help buyers understand scale, but disclose any digitally altered photos per MLS and state guidelines and pair with a floor plan or 3D tour when possible.
What should I do with pets on real estate photo day?
- Relocate or confine pets offsite, remove bowls and litter boxes, and hide toys or crates so photos look clean and distraction‑free.